
Building a floating dock sounds straightforward until you are standing at the water's edge wondering what size to build, which materials will last, and how to keep it from drifting away.
I have seen plenty of docks built with good intentions but wrong materials, and they rarely make it through a second season.
This guide on floating dock construction walks you through everything:planning, materials, buoyancy, building steps, anchoring, and maintenance.
By the end, you will have a clear picture of what it takes to build a dock that holds up year after year without constant repairs.
What Is Floating Dock Construction?
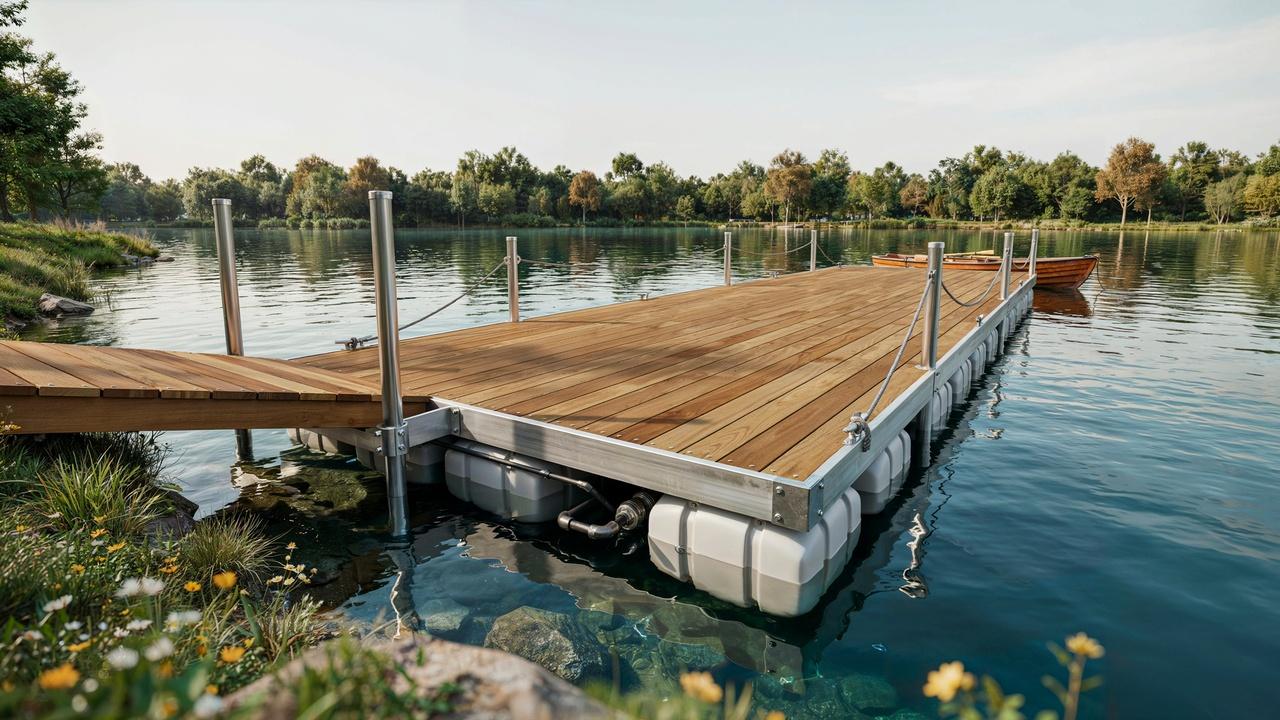
Floating dock construction is the process of building a platform that sits on the water's surface and moves with changing water levels rather than being fixed to the lake or river bed.
Unlike fixed piers that are bolted to permanent pilings driven into the ground, a floating dock uses sealed foam floats or hollow pontoons to stay buoyant.
As water rises and falls with seasons, rain, or tides, the dock rises and falls with it.
This makes floating docks a practical choice for locations where water depth or level changes throughout the year.
The basic structure includes a wooden or aluminum frame, decking boards on top, foam or plastic floats underneath, and an anchoring system that keeps the dock in place without locking it to the bottom.
Floating docks are common on lakes, rivers, ponds, and marinas.
They work well for recreational swimming, fishing, and boat docking, and some owners add a swim platform or kayak launch as part of the original design.
They can also be taken out of the water during winter, which makes them a good option in colder climates where ice would destroy a fixed structure.
How Do You Plan a Floating Dock Design?
Good planning before you buy a single board saves time, money, and frustration later.
Choose the Right Dock Size and Layout
Start by figuring out what the dock needs to do. A dock used only for fishing needs less space than one where you plan to park a pontoon boat, store kayaks, and set out chairs.
A basic personal dock is often 6 to 8 feet wide and 16 to 24 feet long. If you need to tie up a boat, add a slip or an L-shaped or T-shaped extension. Wider docks feel more stable underfoot and give you room to move around safely.
Sketch the layout on paper before committing to anything.
Think about how many people will use it at once, what activities it will support, and whether you might want to add sections later. Modular designs are easy to expand.
Consider Water Depth and Water-Level Changes
Your water depth matters for anchoring more than for the dock itself, but it still affects your design choices.
Check how much the water level rises and falls at your location across seasons. A dock in a reservoir controlled by a dam may rise or drop several feet.
A natural lake might only vary by a foot or two. Your anchoring system and shore connection must handle whatever range your water presents.
If depth changes are significant, you will need an anchoring setup and a ramp connection to shore that can flex with those changes rather than going taut or slacking and causing damage.
Account for Waves, Wind, Current, and Ice
A dock on a calm pond behaves very differently from one on an open lake with boat traffic or strong wind.
Heavy wave action puts stress on frames, connections, and anchors. High winds push the dock against its restraints repeatedly.
River current creates constant pulling force on one side. Ice can crush floats or tear hardware right off the frame if the dock is left in the water too long in freezing climates.
Design your dock to handle the worst conditions your site typically sees. Use heavier hardware, extra bracing, and stronger anchoring in exposed locations. In areas with ice, plan for seasonal removal.
Check Local Permits and Regulations
Before buying materials, contact your local municipality, state or provincial agency, or watershed authority. Many jurisdictions require a permit for any dock installation, even a small one.
Some areas restrict dock size, placement, or materials. Others require setbacks from property lines. Waterfront communities may have neighborhood rules on top of government regulations.
Getting caught with an unpermitted dock can mean fines, forced removal, or both. Spend one afternoon making phone calls or checking online before you start building.
What Materials Do You Need for Floating Dock Construction?
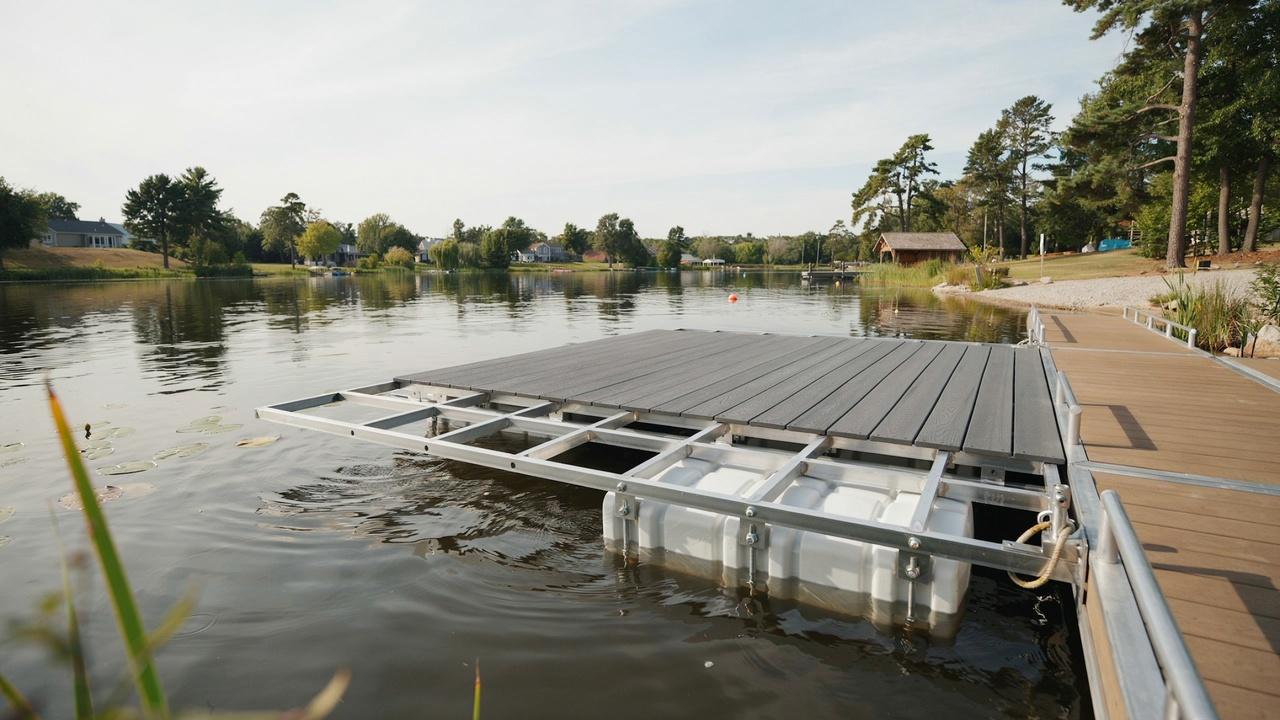
Choosing the right materials from the start means less maintenance, fewer repairs, and a dock built to last.
Foam billets made from expanded polystyrene or plastic pontoon floats provide buoyancy, but always choose encapsulated foam or high-quality rotationally molded plastic over cheap unbranded options that waterlog and fail early.
For decking, pressure-treated lumber costs less upfront while composite decking saves more over time by resisting rot, splintering, and UV damage without regular sealing.
The frame should use ground-contact pressure-treated lumber or aluminum, sized to match your expected load.
Every fastener, bracket, and bolt must be hot-dipped galvanized or marine-grade stainless steel since standard steel rusts fast near water.
Anchoring hardware and the shore-connection gangway deserve the same quality, as a failed anchor or collapsed ramp becomes a serious safety problem fast.
Make sure decking and gangway surfaces are slip-resistant, especially in wet conditions where falls are a real risk.
How Much Buoyancy Does a Floating Dock Need?
Getting buoyancy right is one of the most important steps. Too little and the dock rides low and feels unstable. Too much and it sits high and can be bouncy.
Calculate the Dock's Total Weight
Add up the weight of every component that makes up the dock itself. This includes the frame lumber, decking boards, all hardware, and any built-in features like cleats, ladders, or storage boxes.
A rough starting point is that a typical wood-framed dock weighs around 15 to 25 pounds per square foot before any live load is added.
A 6×20 dock has 120 square feet of surface, so the dead weight might range from 1,800 to 3,000 pounds depending on materials and construction.
Account for People, Boats, and Equipment
The live load is everything that gets added to the dock once it is in use.
Plan for the realistic maximum use scenario. If four adults at 200 pounds each, two kayaks, a cooler, and some chairs will all be on the dock at once, add all of that up.
If you plan to tie a boat alongside that pushes down on a corner cleat, factor that in too.
A general rule used by many dock builders is to plan for at least 20 to 30 pounds of live load per square foot in addition to the dead weight of the dock.
Determine the Required Float Capacity
Once you have a total weight estimate for the dock plus its realistic live load, you know how much buoyancy you need.
Each float or pontoon is rated for a specific lift capacity, which is the amount of weight it can support while keeping the dock at a usable height above water.
Add up the rated capacities of all your floats and make sure the total exceeds your estimated total weight by a comfortable margin.
Building in a buffer of 20 to 30 percent above your estimated maximum load is a reasonable approach.
It keeps the dock riding at a good height and gives you room if you underestimate any weights.
Allow Enough Freeboard
Freeboard is the distance from the water surface to the top of the dock deck. A dock that rides too low ships water in waves and is hard to use.
One that rides too high is hard to step onto from a boat.
Most residential floating docks work best with 12 to 18 inches of freeboard under typical load. Check the float manufacturer's specifications for the recommended load to achieve this range.
How Do You Build a Floating Dock?
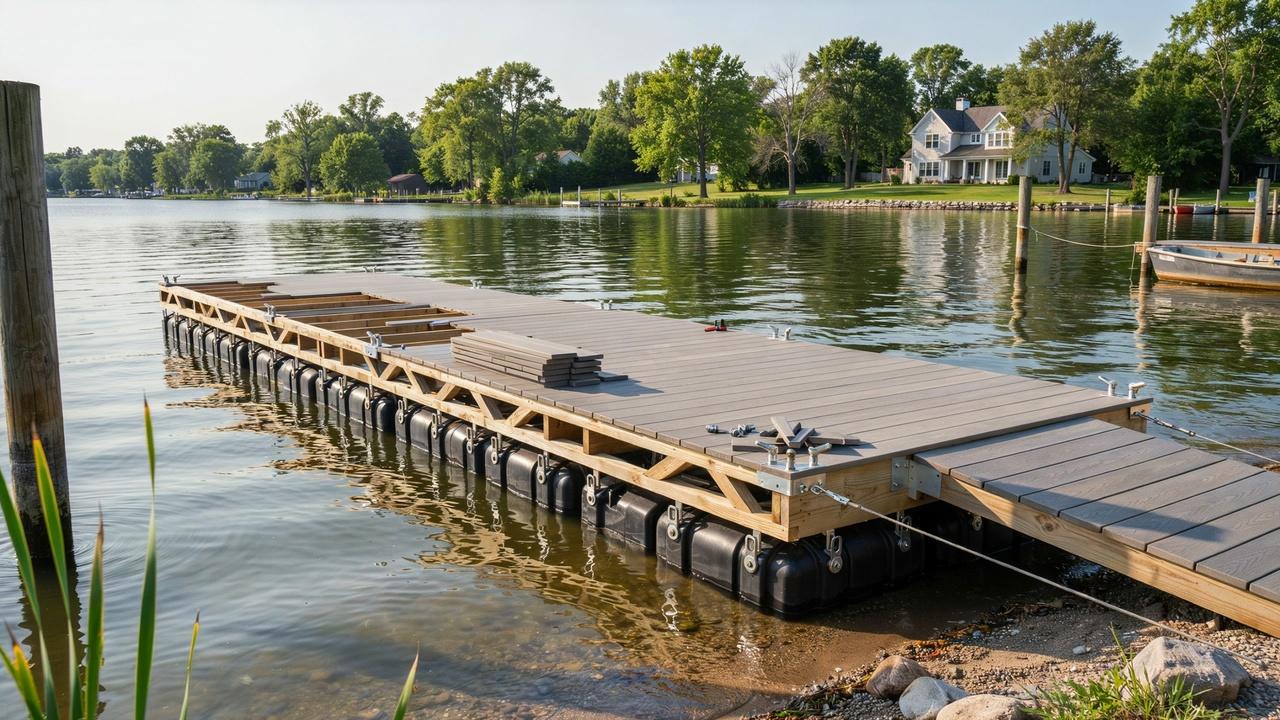
With your materials gathered and your plan in hand, the build itself follows a clear sequence.
Build and Square the Dock Frame
Start by building the outer rectangle of the dock frame on a flat surface like a driveway or lawn, with the bottom side facing up so the floats are easy to attach in the next steps.
Cut your lumber to length and fasten the corners with structural screws or bolts.
Once the rectangle is together, check it for square by measuring corner to corner diagonally.
Both diagonal measurements must be equal, and they should be within one-eighth of an inch of each other.
If they are not, adjust the frame until they match before adding anything else. A frame that goes in crooked will cause problems with every step that follows.
Add Joists and Structural Bracing
With the outer frame squared, add the interior cross joists at regular intervals. Spacing of 16 inches on center is standard for a strong, solid-feeling deck.
Use joist hangers at each connection for secure, metal-to-metal attachment.
Add blocking between joists at the float attachment points if the floats are going to be bolted directly to the frame. This strengthens the connection and spreads the load.
Attach and Secure the Floats
With the frame still upside down, lay out the float support boards and floats to determine their exact positions before drilling anything.
Leave about 6 inches of spacing between the floats and the outer edge of the main structure to allow for handling.
Mark the bracket locations, screw the float brackets into the frame, then secure the floats to the brackets using lag bolts and large flat washers.
Lock washers and flat washers with standard bolts also work well here.
Distribute floats evenly across the width and length of the dock. Concentrating too many at one end creates an imbalanced dock that tips.
Make sure every bolt is tightened completely before moving to the next step.
Install the Decking
Carefully flip the frame right-side up with help from another person before laying any deck boards.
Recheck the frame for the square once it is right-side up.
Leave a gap of roughly an eighth to a quarter inch between boards to allow for expansion and water drainage. Use two fasteners per board at each joist crossing.
Start from one edge and work across systematically. Check periodically that the boards are staying parallel and the gaps are consistent.
Trim the ends flush with the frame once all boards are down.
Add Dock Hardware and Accessories
Install cleats, dock bumpers, ladders, and any lighting or electrical components before launching the dock.
It is much easier to drill, fasten, and wire on land than in the water. If you plan to add electrical outlets, have a certified electrician handle that portion.
Position cleats where boats will actually tie up, not just where they look symmetrical. Place bumpers at corners and along sides where a boat hull might contact the dock.
How Do You Anchor a Floating Dock?
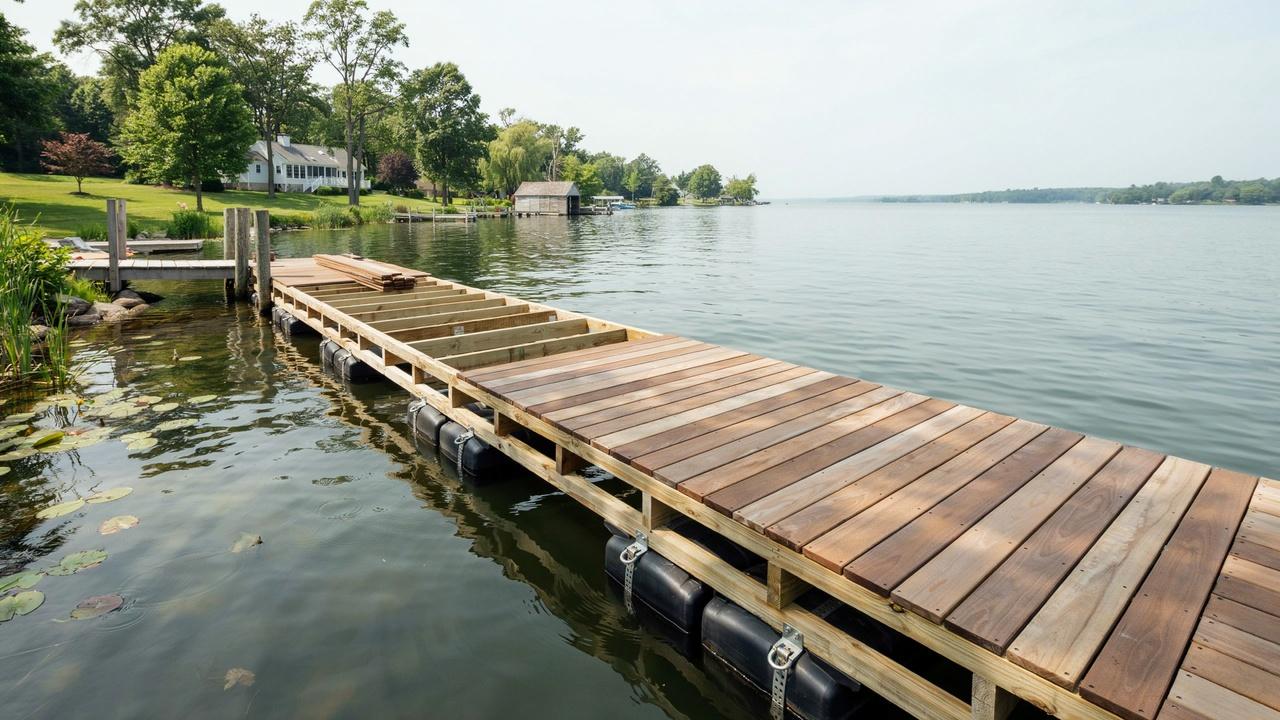
A dock without a proper anchoring system will drift, swing, or shift with every change in wind and water.
Guide posts are steel pipes driven into the bottom with sleeve brackets that let the dock slide up and down as water levels change, making them ideal for calm water with moderate level variation.
Anchor lines use cables or chains connected to bottom anchors and work better in deeper water or where driving posts is not possible.
When using concrete deadweight anchor blocks, load them onto the dock first, then tip them into the water while holding the chain end, attaching the chain to each corner with a shackle before cutting to length and saving about two extra feet for seasonal adjustments.
High current locations need anchoring on both sides, while wave-prone areas benefit from spring lines that absorb shock.
The shore connection should use a hinged aluminum gangway with a slip-resistant surface sized to stay at a safe angle at both high and low water.
Every connection point must allow vertical movement so nothing binds, goes slack, or fails as water levels shift through the seasons.
Which Floating Dock Design and Materials Are Best?
There is no one-size-fits-all answer, but some combinations work better than others depending on your situation.
Dock Structure
| Feature | Single-Section Dock | Modular Dock |
| Structure | One rigid platform | Smaller sections joined by hinges or brackets |
| Build Complexity | Simpler to build | Slightly more involved |
| Flexibility in Waves | None, puts stress on frame | Each section flexes independently |
| Expandability | Difficult to expand or move | Easy to reconfigure, expand, or remove |
| Best For | Calm, protected water | Lakes with wave activity |
Decking Material
| Feature | Pressure-Treated Wood | Composite Decking |
| Upfront Cost | Lower | Higher |
| Maintenance Required | Cleaning, sealing, or staining every few years | Occasional washing only |
| Durability Over Time | Prone to splitting and greying | Holds up better over 10 to 15 years |
| Long-Term Cost | Higher when maintenance is factored in | Often lower over time |
| Best For | Budget-focused builds | Low-maintenance preference |
Build Approach
| Feature | DIY from Scratch | Floating Dock Kit |
| Cost | Generally lower | Higher for same square footage |
| Control Over Design | Full control over size, shape, and materials | Limited to kit configuration |
| Assembly Speed | Slower | Faster |
| Risk of Errors | Higher without experience | Lower due to engineered components |
| Support Available | None | Instructions and customer support included |
| Best For | Experienced builders with time | First-time builders or those with limited time |
What Are the Most Common Floating Dock Construction Mistakes?
Knowing what goes wrong most often helps you avoid the same problems.
- Underestimating buoyancy is the most common mistake. Always calculate dead weight plus realistic live loads and add a 20 to 30 percent buffer so the dock never rides too low under full use.
- Uneven float placement causes tipping and bouncing. Spread floats across the full footprint, place them near corners and edges, and position them based on where the heaviest loads will actually sit.
- Standard steel hardware rusts within a season or two near water. Use only hot-dipped galvanized or marine-grade stainless steel fasteners, joist hangers, and bracing at every connection point throughout the build.
- A calm-pond anchoring system will not hold on an open lake. Match your anchoring setup to real site conditions, test it through a full water-level cycle, and always use oversized hardware.
- Seasonal conditions catch many builders off guard. Research the full water-level range at your site, plan for worst-case storms, and remove the dock before ice forms in colder climates.
How Do You Maintain a Floating Dock?
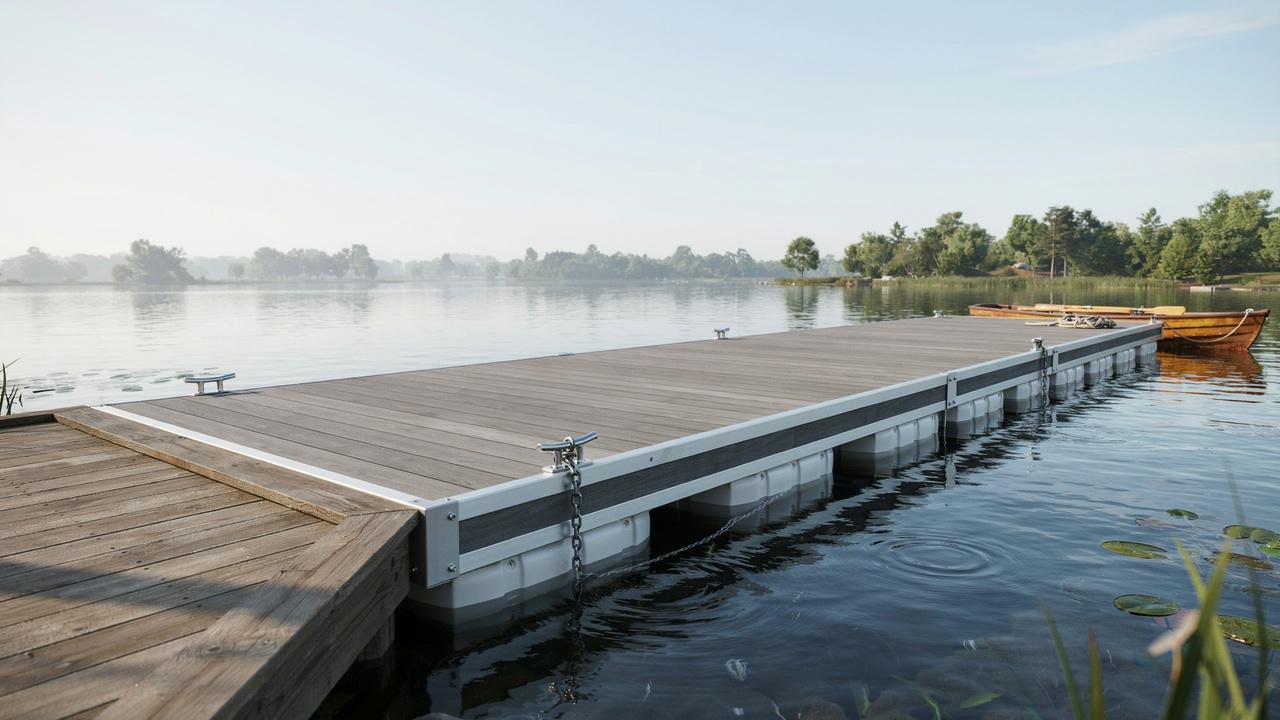
A floating dock that gets regular attention lasts far longer than one ignored until something breaks.
At the start of each season, inspect every float for cracks, punctures, or waterlogging, check the frame for rot at joints and low spots, and look over the decking for loose boards, splinters, or cupping.
Walk the dock and tighten any fasteners that have backed out, replace cracked brackets, and check anchor cables and chains for corrosion, kinks, or worn contact points since a failed cable during a storm can send the dock into neighboring property.
Before major storms, add extra lines or temporary anchor points. In ice-prone climates, remove the dock before freezing begins and store sections on shore away from snow load and direct sun exposure.
Conclusion
Floating dock construction rewards anyone who takes the time to plan carefully, choose the right materials, and build with quality hardware from the start.
A dock built on solid foam or plastic floats, a properly treated frame, corrosion-resistant fasteners, and a dependable anchoring system will give you years of use with only routine upkeep.
Calculate your buoyancy needs, check your local permit requirements, and match every design decision to the real conditions at your site.
If this guide helped you move closer to your build, share it with a neighbor or friend who is planning a dock project.
Drop a comment below with any questions, and take a look at our related guides on dock accessories, seasonal removal, and waterfront maintenance to keep your dock in top shape for years to come.
Frequently Asked Questions
Can a floating dock be used in saltwater?
Yes, but use marine-grade stainless steel hardware throughout and choose plastic or fiberglass-encased floats. Saltwater corrodes galvanized steel much faster than freshwater does.
How long does a floating dock typically last?
A well-built floating dock with quality materials lasts 20 to 30 years. Regular inspection and prompt repairs extend its lifespan significantly.
Do floating docks need to be removed every winter?
Not always. In mild climates with no ice, year-round use is fine. In areas with ice, removal before freeze-up is strongly recommended.
What is the best float spacing for a residential dock?
Place floats no more than 4 to 6 feet apart across the width and along the length. Closer spacing improves stability and load distribution.
Can you attach a boat lift to a floating dock?
Yes, but the dock must be specifically engineered to handle the added weight and load concentration. Consult the lift manufacturer before installing.