A metal building kit shows up on a flatbed, so building a metal building sounds like a weekend of bolting. It isn’t.
If you’re wondering how to build a metal building, the steel is the quick part.
The weeks before decide whether your walls end up straight. One small slip in the slab can follow you all the way to the roof.
I’ll walk you through what the project looks like, what to settle early, and where self-builds tend to go wrong.
Let’s start with the full picture, from the first permit to the last trim piece.
How Do You Build a Metal Building from Start to Finish?
A pre-engineered metal building goes up in six ordered phases, starting with permits and design.
After that come the site and foundation, the primary frame, secondary framing, panels and trim, and finishing.
The kit arrives fabricated to fit, so the real work is getting the order right. Each phase decides how well the next one fits, which is why you can’t shuffle them.
Weather and permit timing can push the schedule around, but the order itself stays put. Permits can take weeks, and the slab needs to cure before steel goes on, often at least a week and longer in cold weather.
Raising the frame often goes faster than the work before it. The delays and mistakes tend to sit earlier, in permits, planning, and the slab, long before steel shows up.
Before you lock in a schedule, check the metal building cost side too, since permits and slab work change the total.
Because the early phases cause most of the trouble, they come next: loads, openings, permits, and the kit-or-contractor call.
What Do You Need to Settle Before Building a Metal Building?
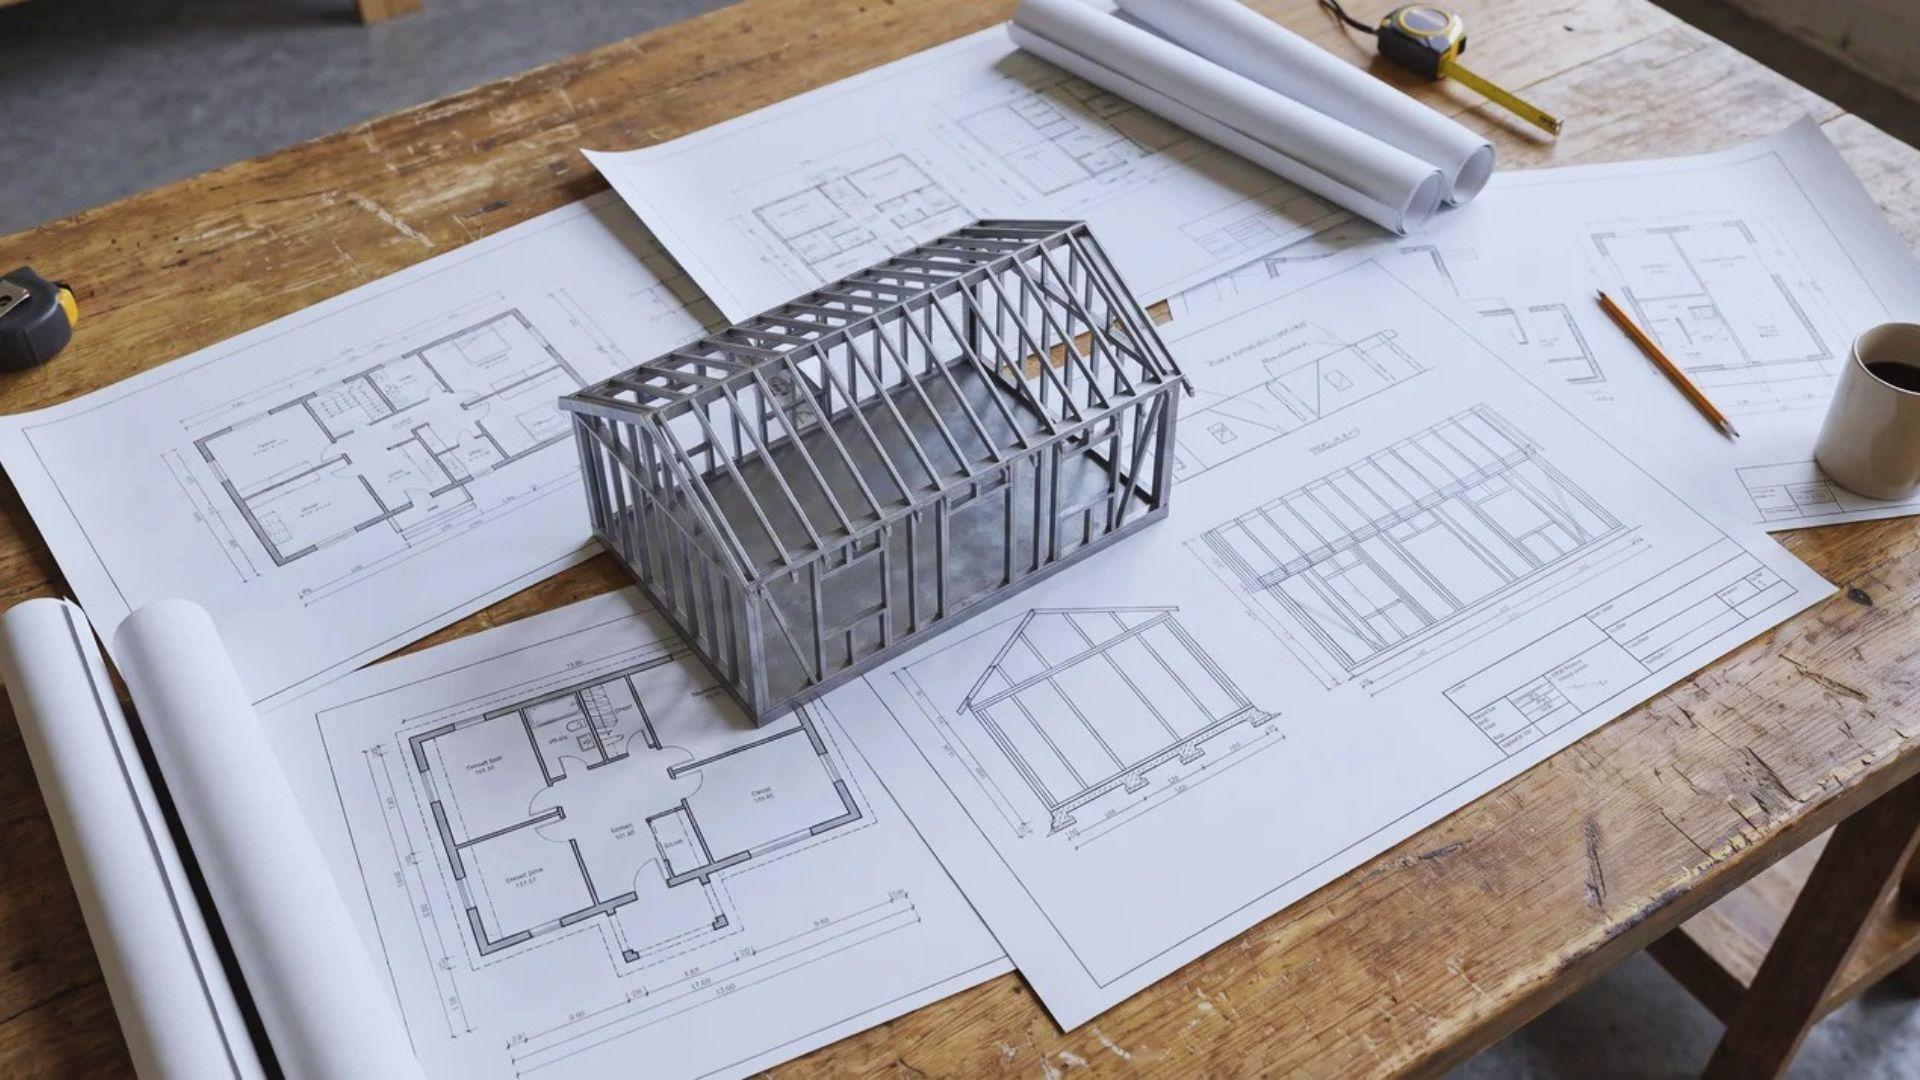
Before you order steel, fix the size, loads, openings, and permit path. The engineered plans and the foundation both depend on them.
Which Design Decisions Lock Your Plans?
Size and use set the starting point. A building with a mezzanine or hanging equipment needs a stronger frame than an empty one.
Local wind, snow, and seismic loads decide how heavy the steel is and how big the foundation must be. Every column pushes those forces down into the slab.
A kit designed for a mild area can fail inspection in a snowy one. Door and window openings belong in the drawings too, since each one needs its own framing.
Order before you confirm any of this, and you may pay for a redesign and a new foundation layout.
What Do Permits and Engineered Drawings Involve?
Most building departments want a permit application, stamped engineered drawings, and a site plan before you break ground.
Your supplier usually provides the drawings, but an engineer licensed for your area has to stamp them.
After approval, inspectors usually visit at set points, such as the foundation, and must sign off first.
Rules differ by county and by building size, so call your building department before ordering. Zoning, setbacks, and easements can also limit where the building sits.
Can You Build It Yourself with a Kit, or Do You Need a Contractor?
A kit comes with drawings and labeled parts, so assembly is realistic if you can read plans. You also need a few capable helpers, because frames are heavy and awkward to steady while you bolt them.
Size changes the answer. Small, simple buildings suit a self-build, while wide buildings have heavy frames that need a crane and a bigger crew.
I’d hire out two jobs: the slab and the heavy lifting. A bad pour can’t be undone, and an operator on a forklift or crane is safer than hand lifting.
With plans stamped and a crew lined up, the work moves outside, starting with the ground under everything.
How to Build a Metal Building: Step by Step
Building a metal building on site follows five steps, from foundation through finishing. Errors compound upward, so a step isn’t done until you have checked it.
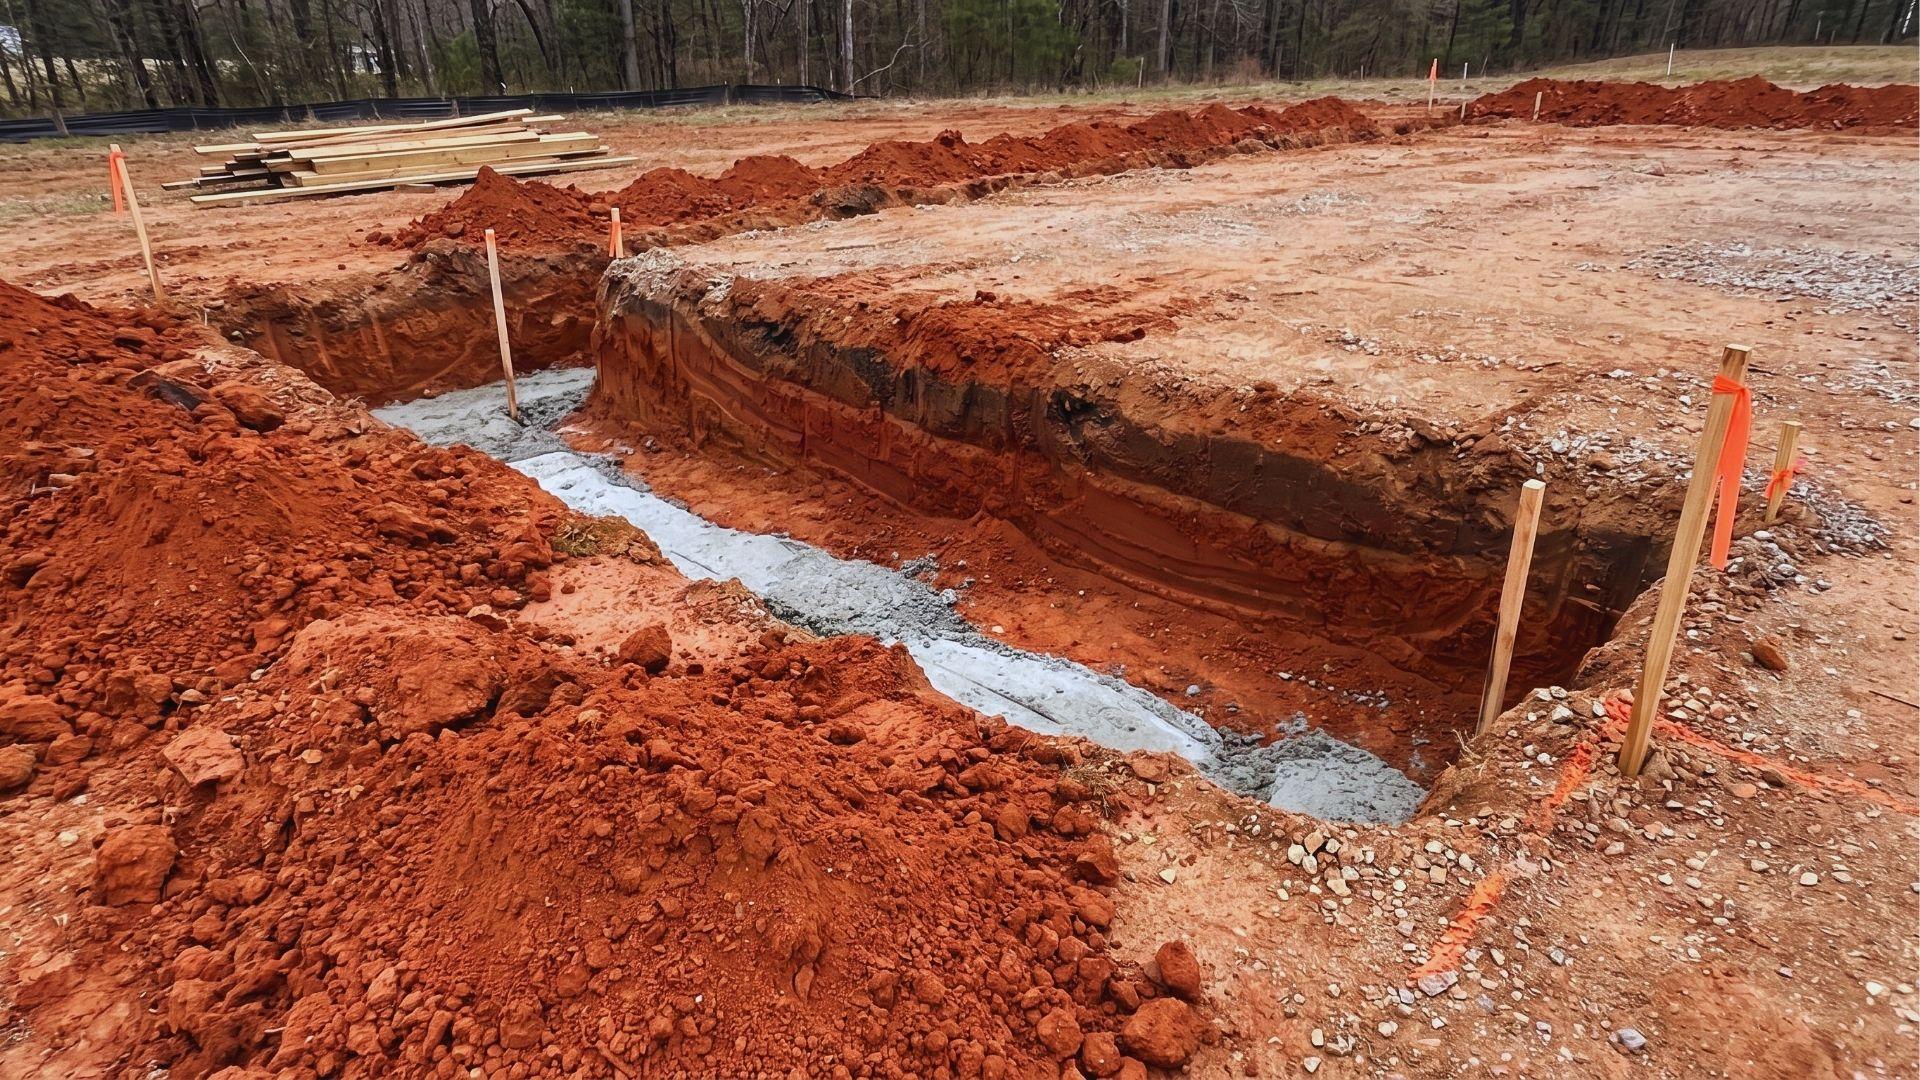
Step 1: Prepare the Site and Pour the Foundation
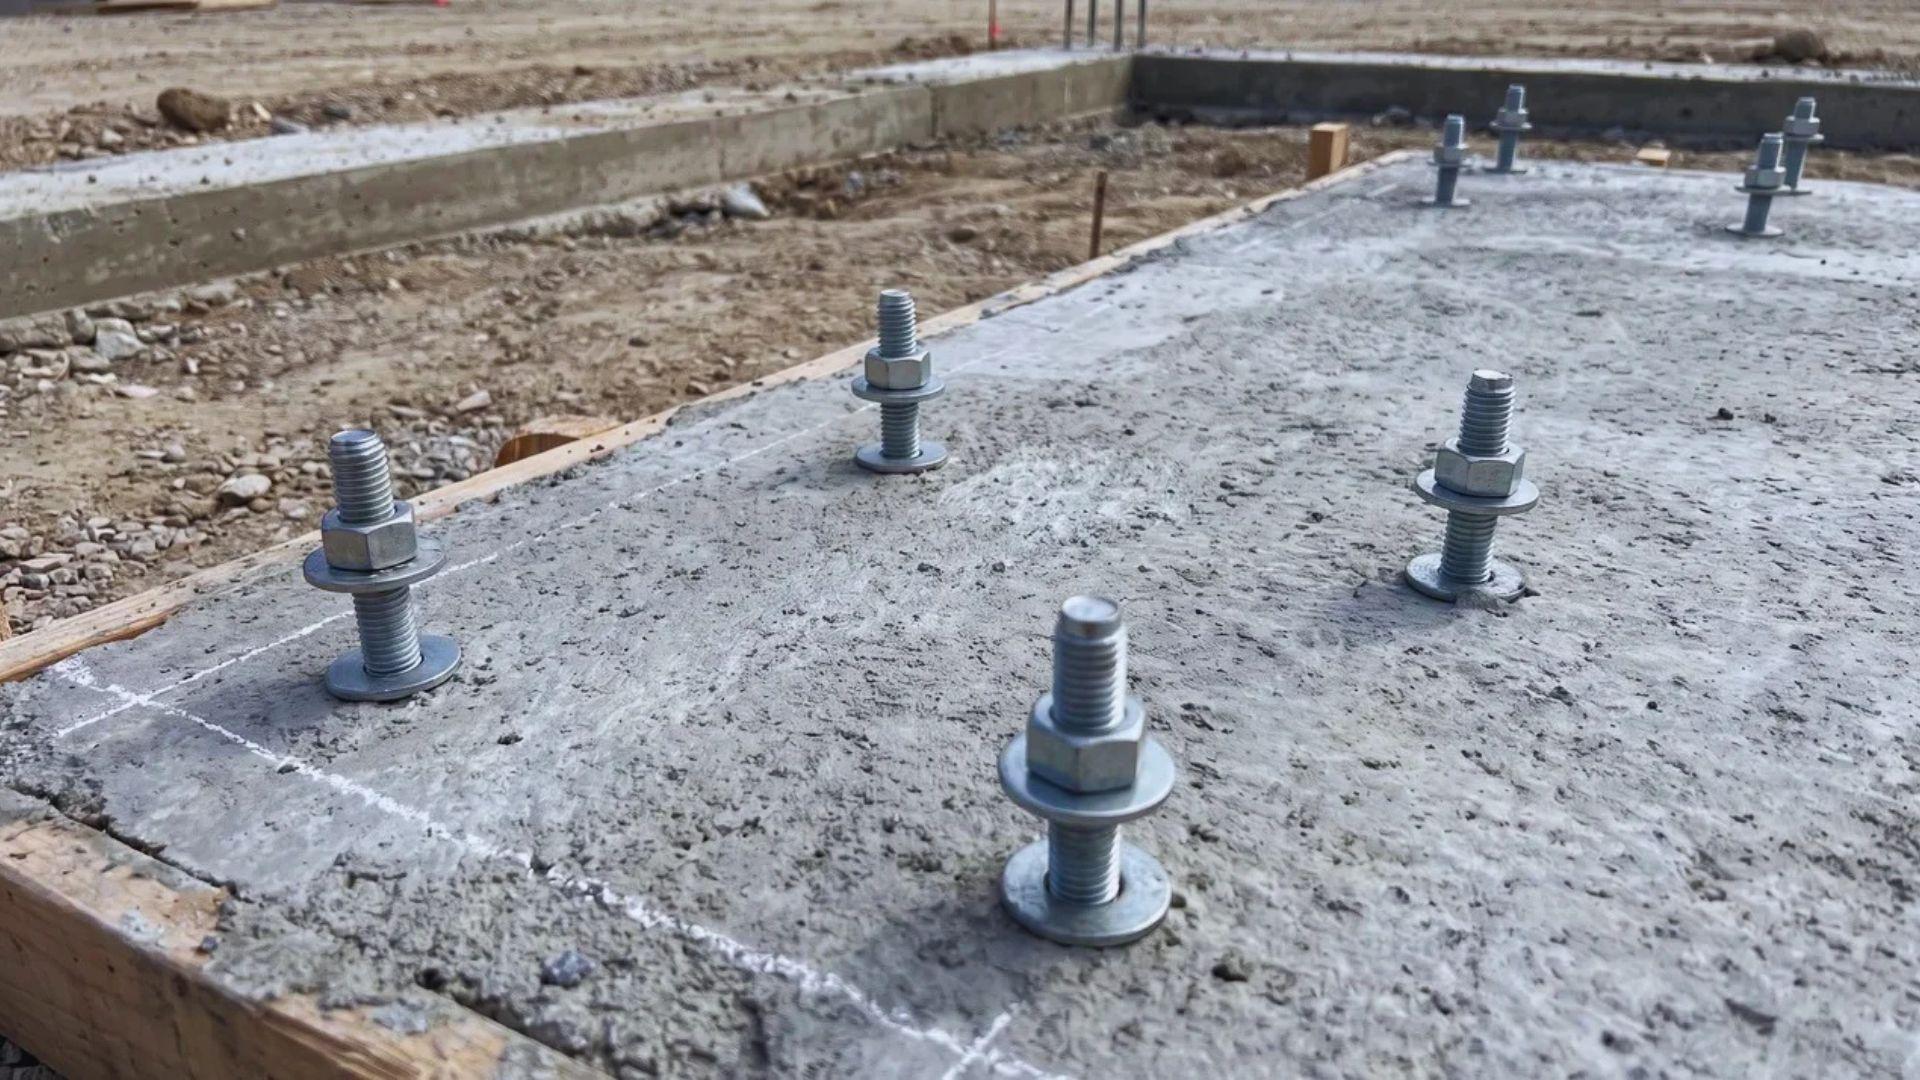
Clear and level the site, then pour the slab and footings to the engineer’s drawings. Grading and concrete get the attention, but the anchor bolts decide how the rest of the build goes.
Each column base bolts down at one exact spot. Any error in the concrete passes to the column, then the rafters, then the roofline.
Not every slab error costs the same. A slab slightly off level can be shimmed, but a misplaced bolt usually means drilling or chipping concrete.
Before the steel arrives, run these checks:
- Measure the bolt layout against the drawings.
- Check the diagonals between opposite corners, since equal diagonals show the layout is square.
- Check the bolt heights.
Footing depth depends on your soil and frost line. The slab also has to cure before steel goes on. Many specs call for at least a week, and full strength takes about 28 days, so follow your engineer’s requirement.
Step 2: Assemble and Raise the Primary Frame
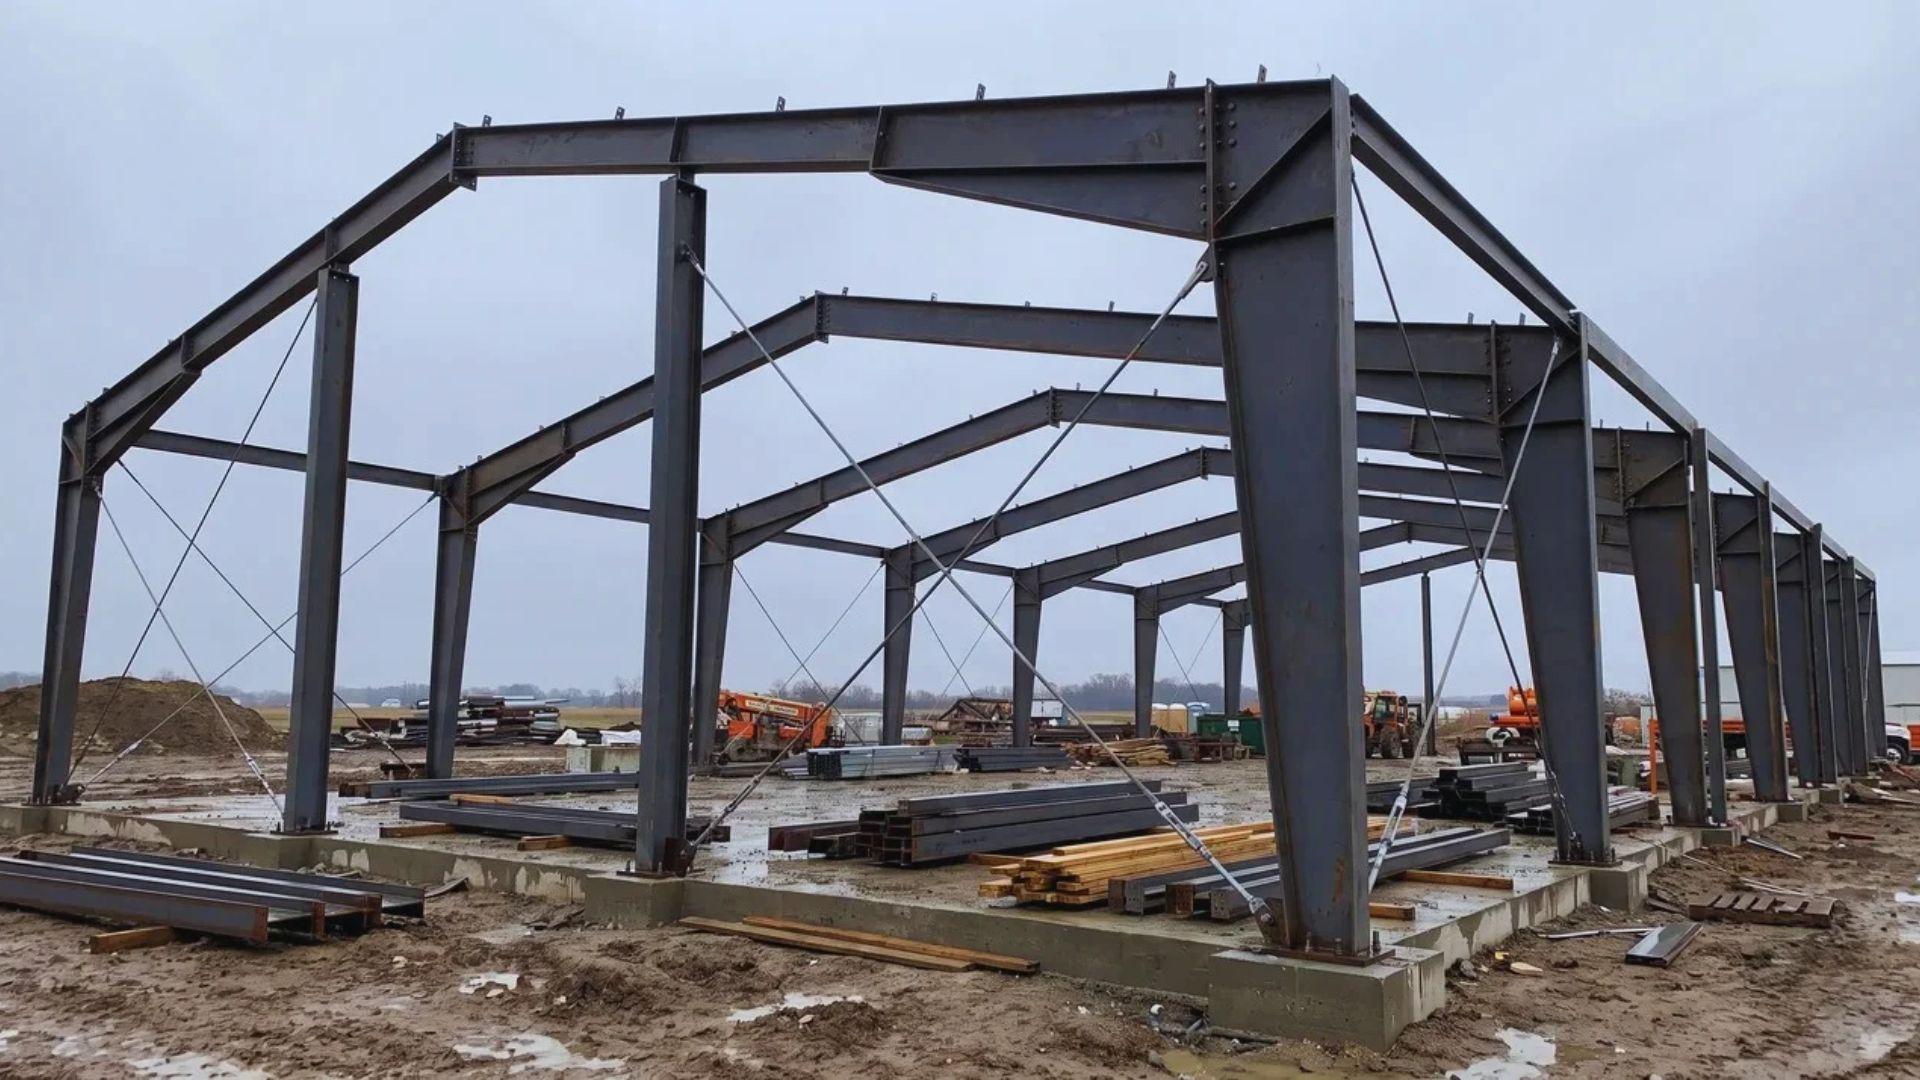
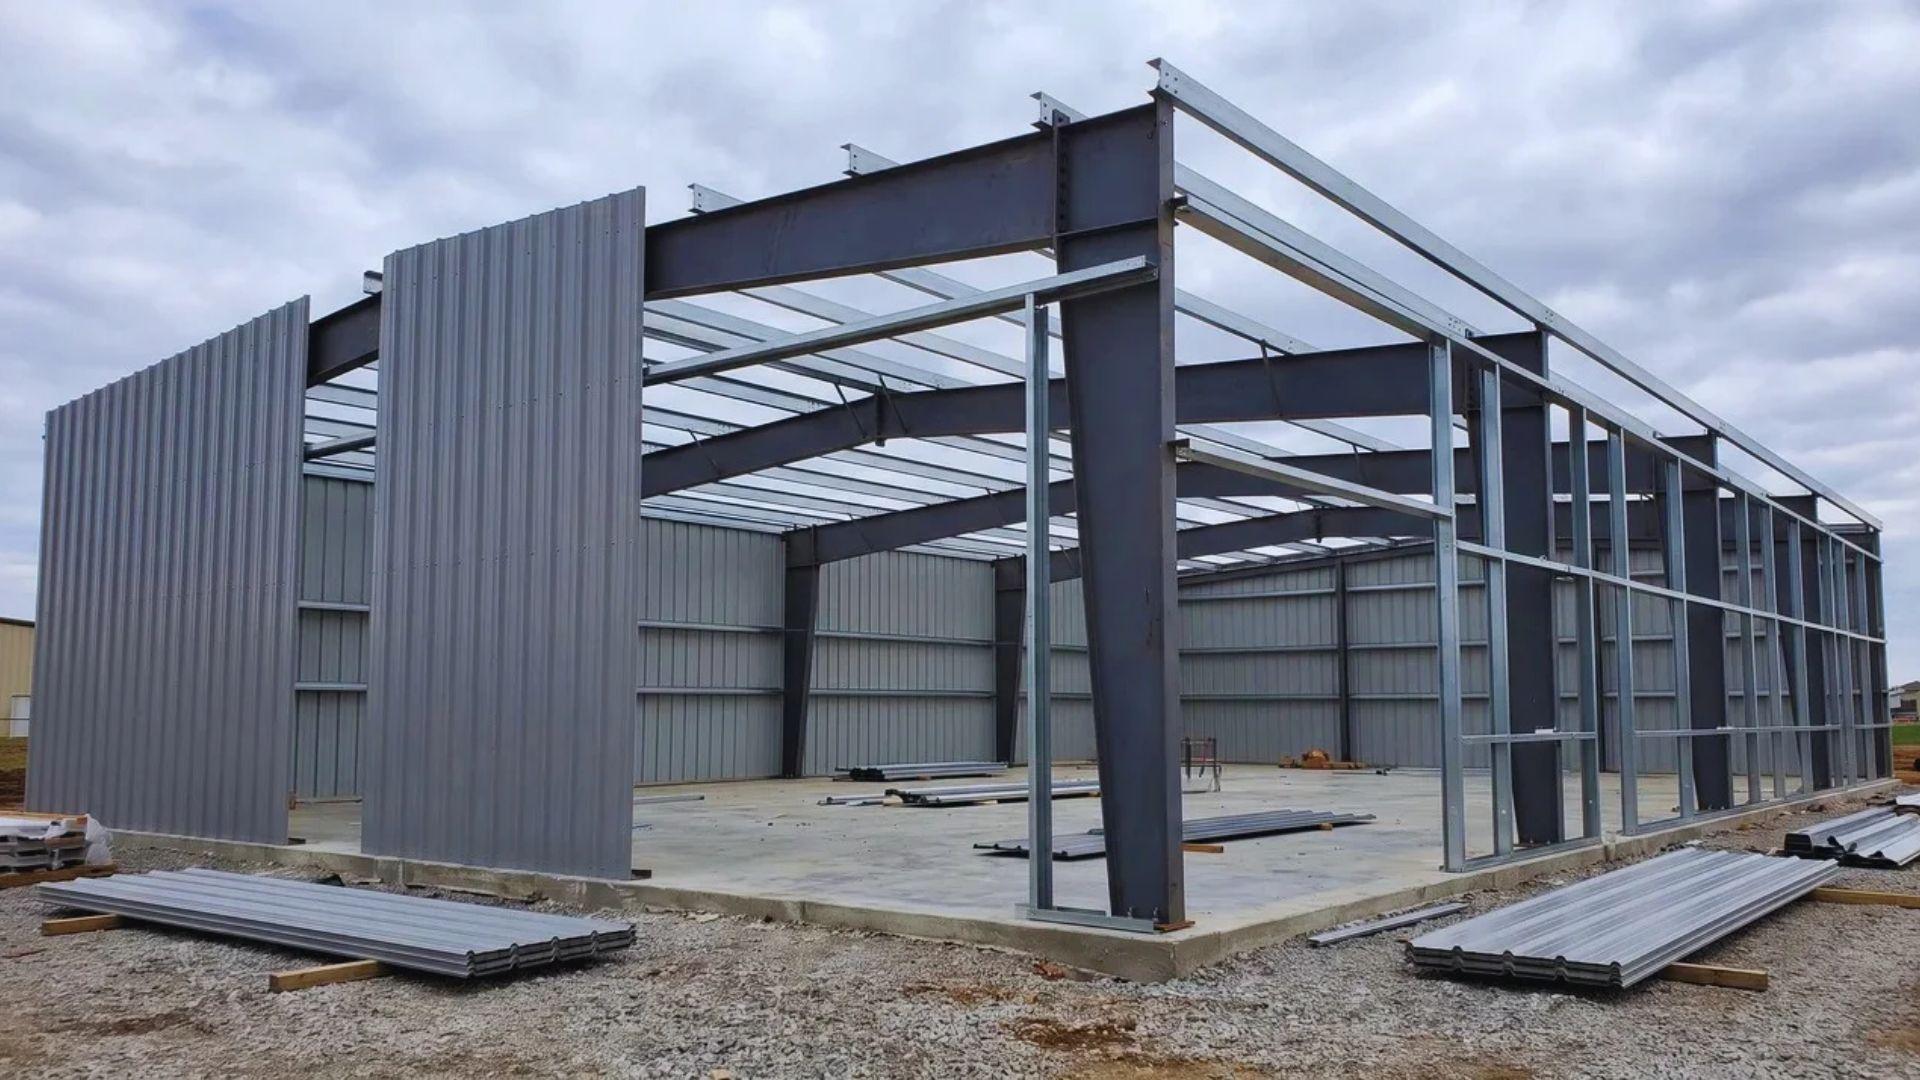
Lay each column and rafter flat on the ground and bolt them into one frame. A spud wrench has a tapered end that pulls misaligned bolt holes into line, and you will use it on the ground and in the air.
Lift the first frame onto the anchor bolts. A small kit may need only a forklift, while wide buildings often need a crane.
Start at a braced bay, the one with diagonal bracing, so it holds steady while the others join it.
Keep the bolts finger-tight as you connect each new frame. Bolt holes are slightly larger than the bolts, and that small play lets you plumb and align each frame.
Once the bolts are tight, that play is gone, and any lean is locked in.
To get the frame square before that happens:
- Run temporary cables or strapping in an X pattern between frames.
- Pull them until the structure sits square.
- Tighten the structural bolts only after that.
Tightening as you go feels faster, but it freezes small errors in early frames, and they add up. Your kit manual may order these steps differently, so follow it where it does.
Step 3: Install Purlins, Girts, End Walls, and Framed Openings
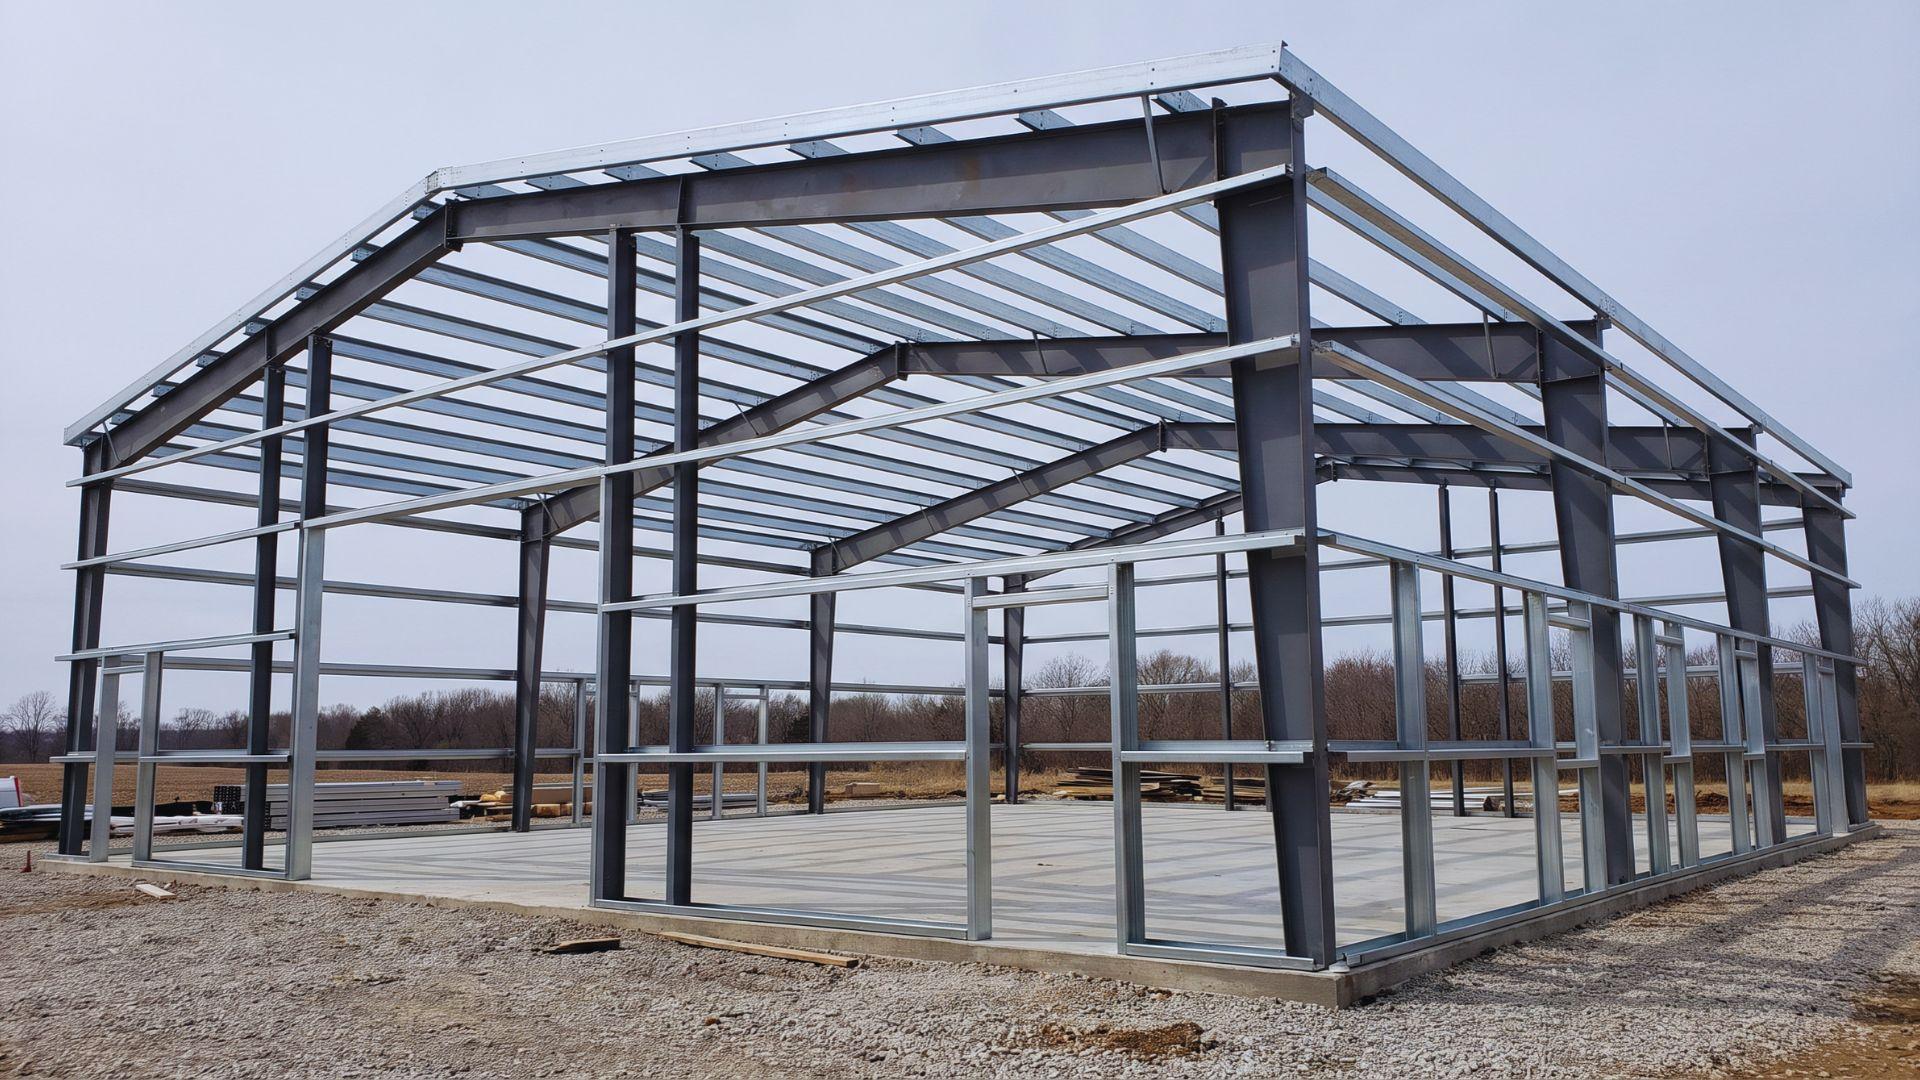
With the frames standing, add purlins in construction across the rafters and girts between the wall columns. Together, they form the grid your roof and wall panels screw into.
Pieces usually carry an orientation arrow, and the larger flange has to face the direction shown.
Then build the end walls and frame the openings:
- Overhead doors
- Walk doors
- Windows
Frame them now, because adding an opening later means cutting into finished panels.
Step 4: Attach Roof and Wall Panels and Trim
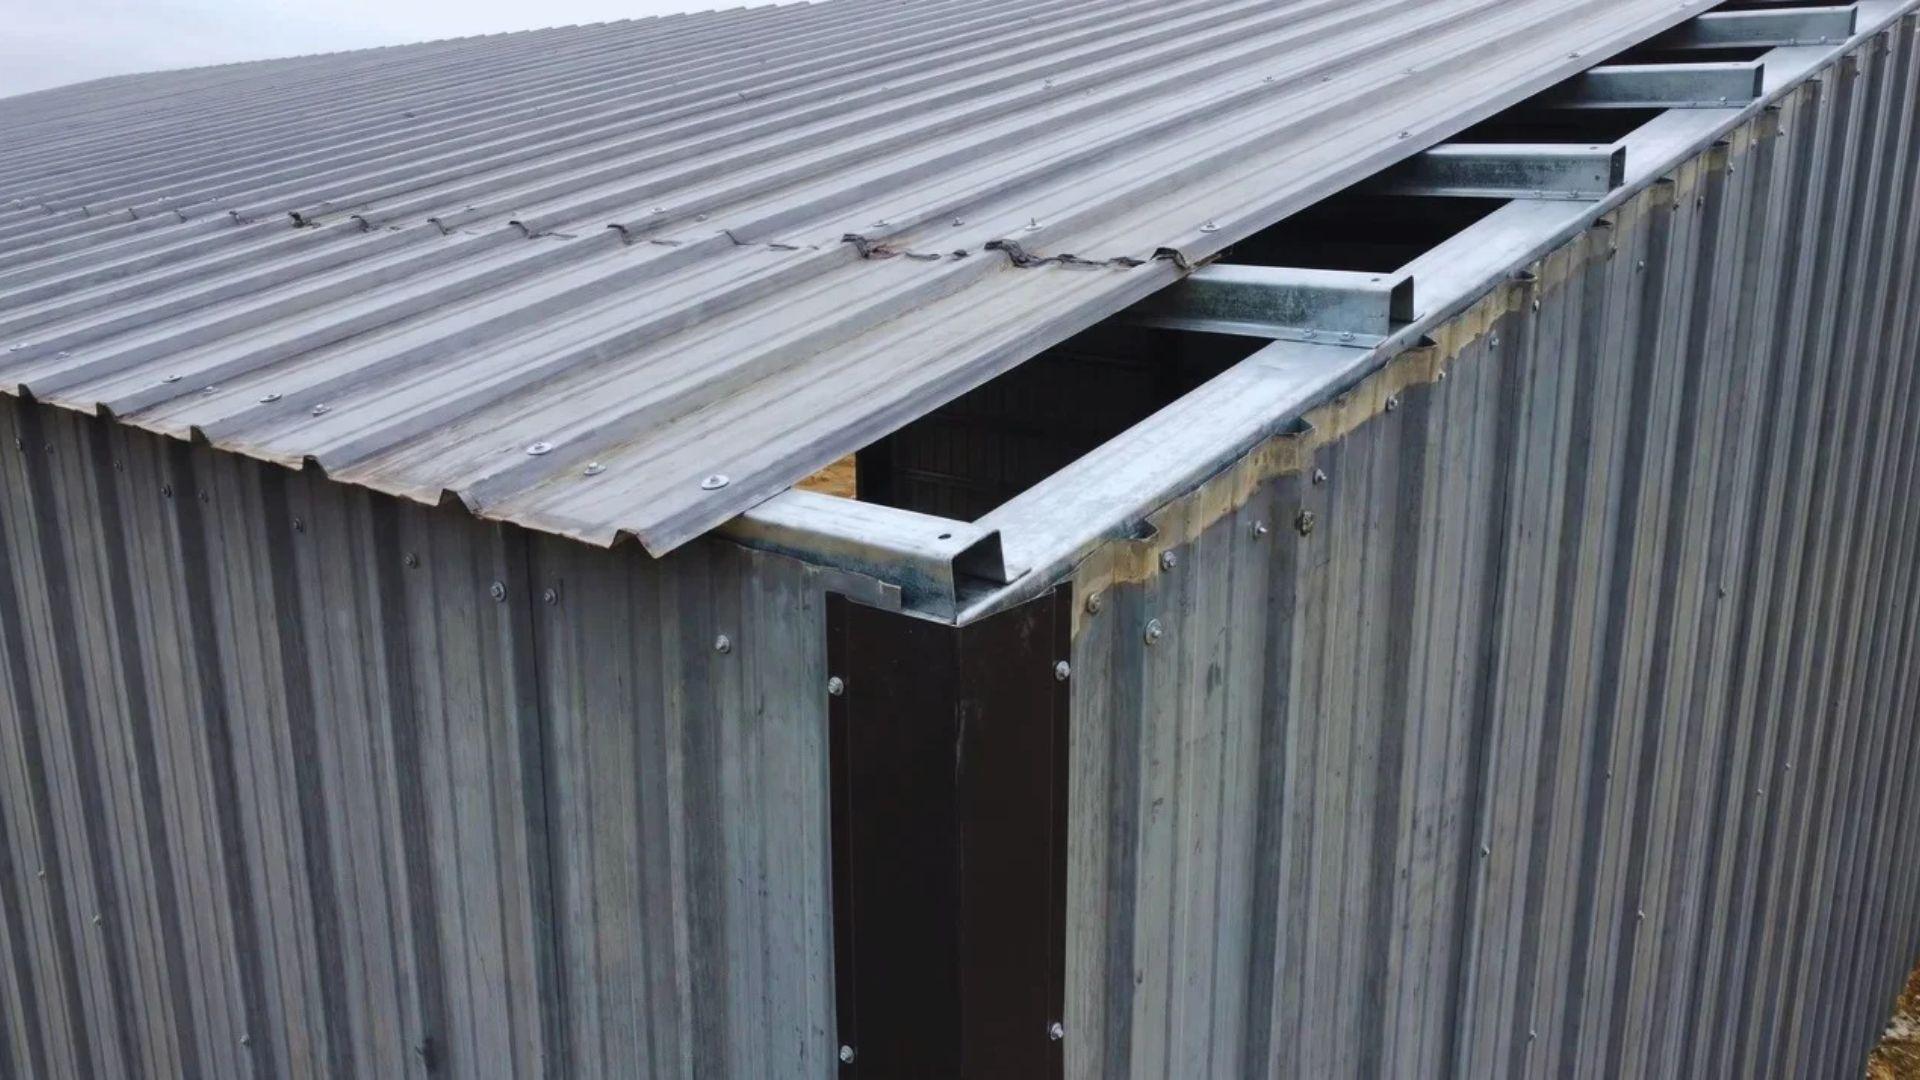
Wall panels usually go on first, then the roof panels, with trim last, though your manual sets the exact order.
Start at the end away from the prevailing wind, so the overlaps face away from wind-driven rain.
Each screw has a rubber washer that seals the hole. Drive it until the washer flattens slightly against the panel.
Both mistakes cause leaks:
- Overdriving crushes the washer.
- Underdriving leaves a gap.
Trim covers the corners, eaves, and ridge, and it hides the cut edges of the panels.
Step 5: Insulate, Fit Doors and Windows, and Finish
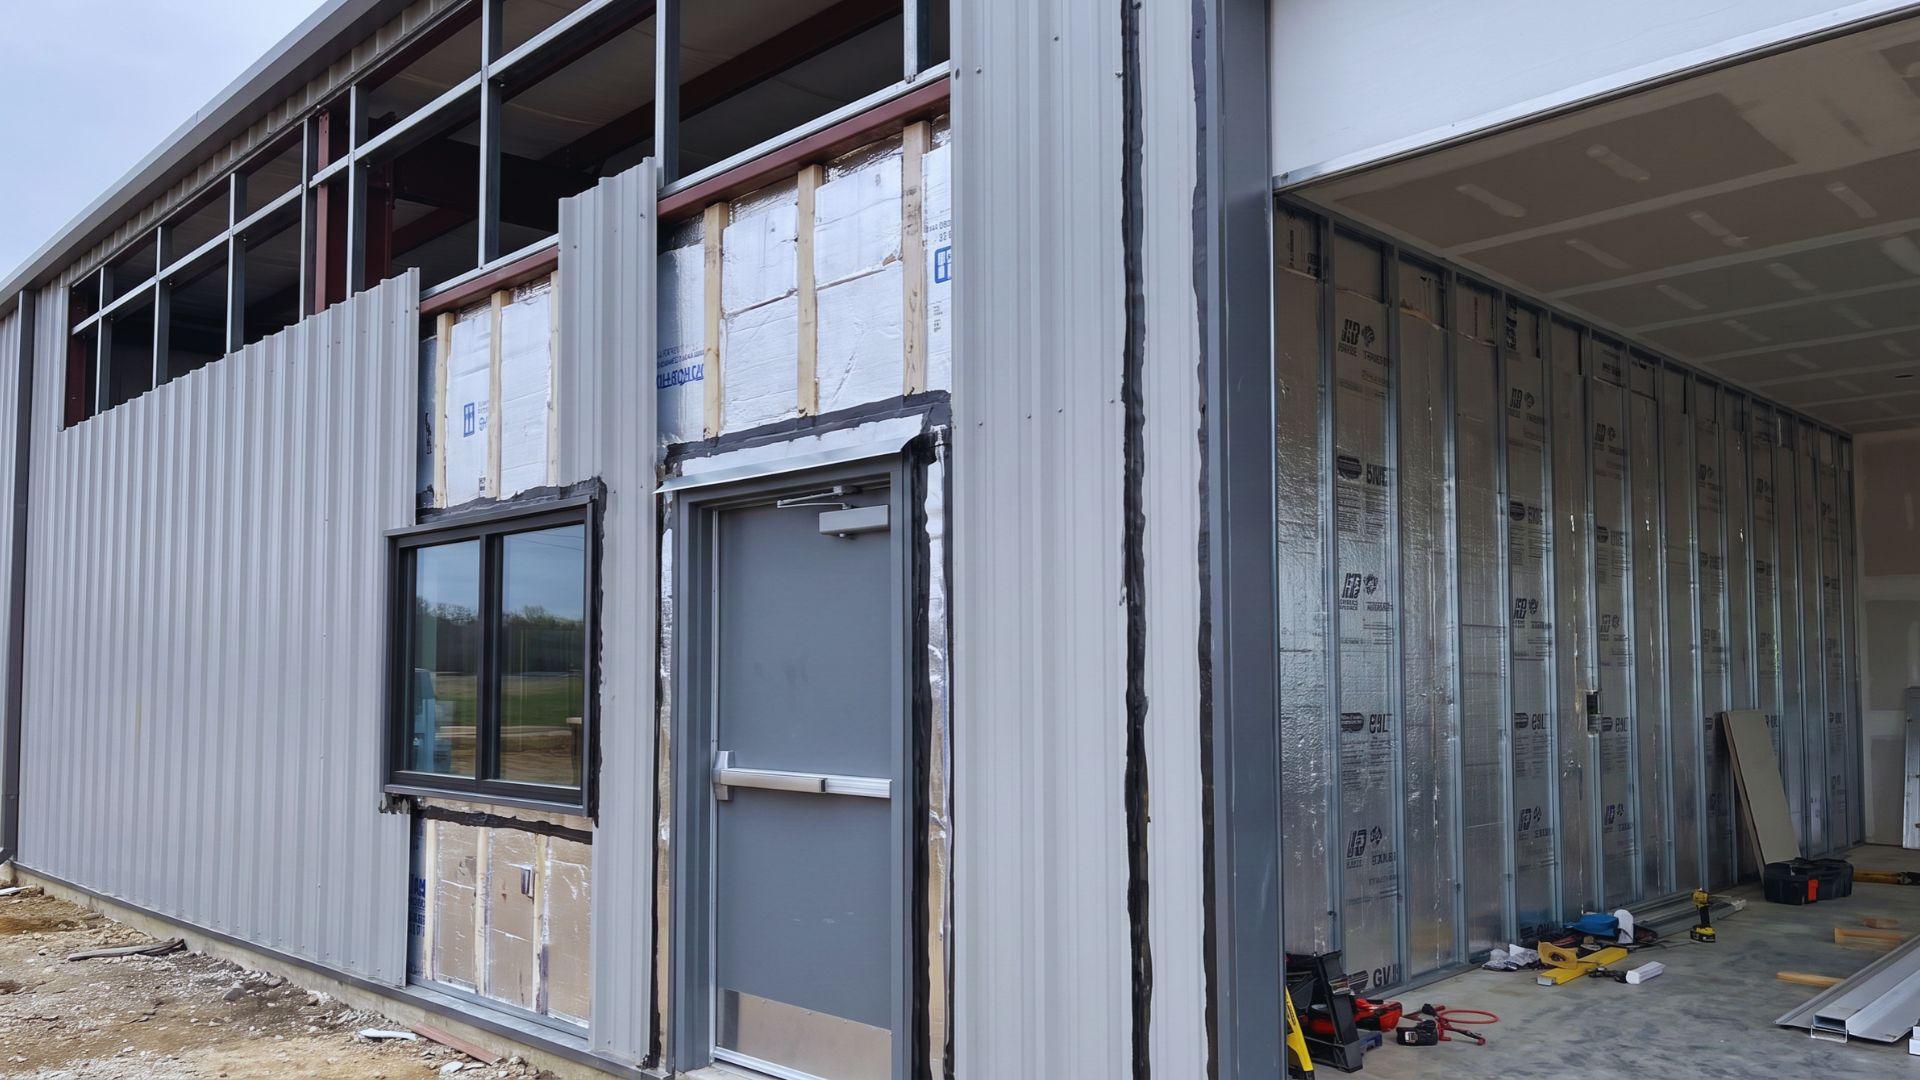
Depending on your kit, insulation goes in as the panels go on or right after them.
Doors and windows then fit into the framed openings, with trim around each one. Seal the gaps with the closures and sealant your kit includes.
Before you leave, sweep off every metal shaving from drilling, because shavings rust and stain the panels.
Those five steps read like a clean list, but a few of them hide mistakes that show up later. Self-builds tend to go wrong in the same few places, and each has a check that catches it.
What Goes Wrong in Self-Installation, and How Do You Check Each Stage?
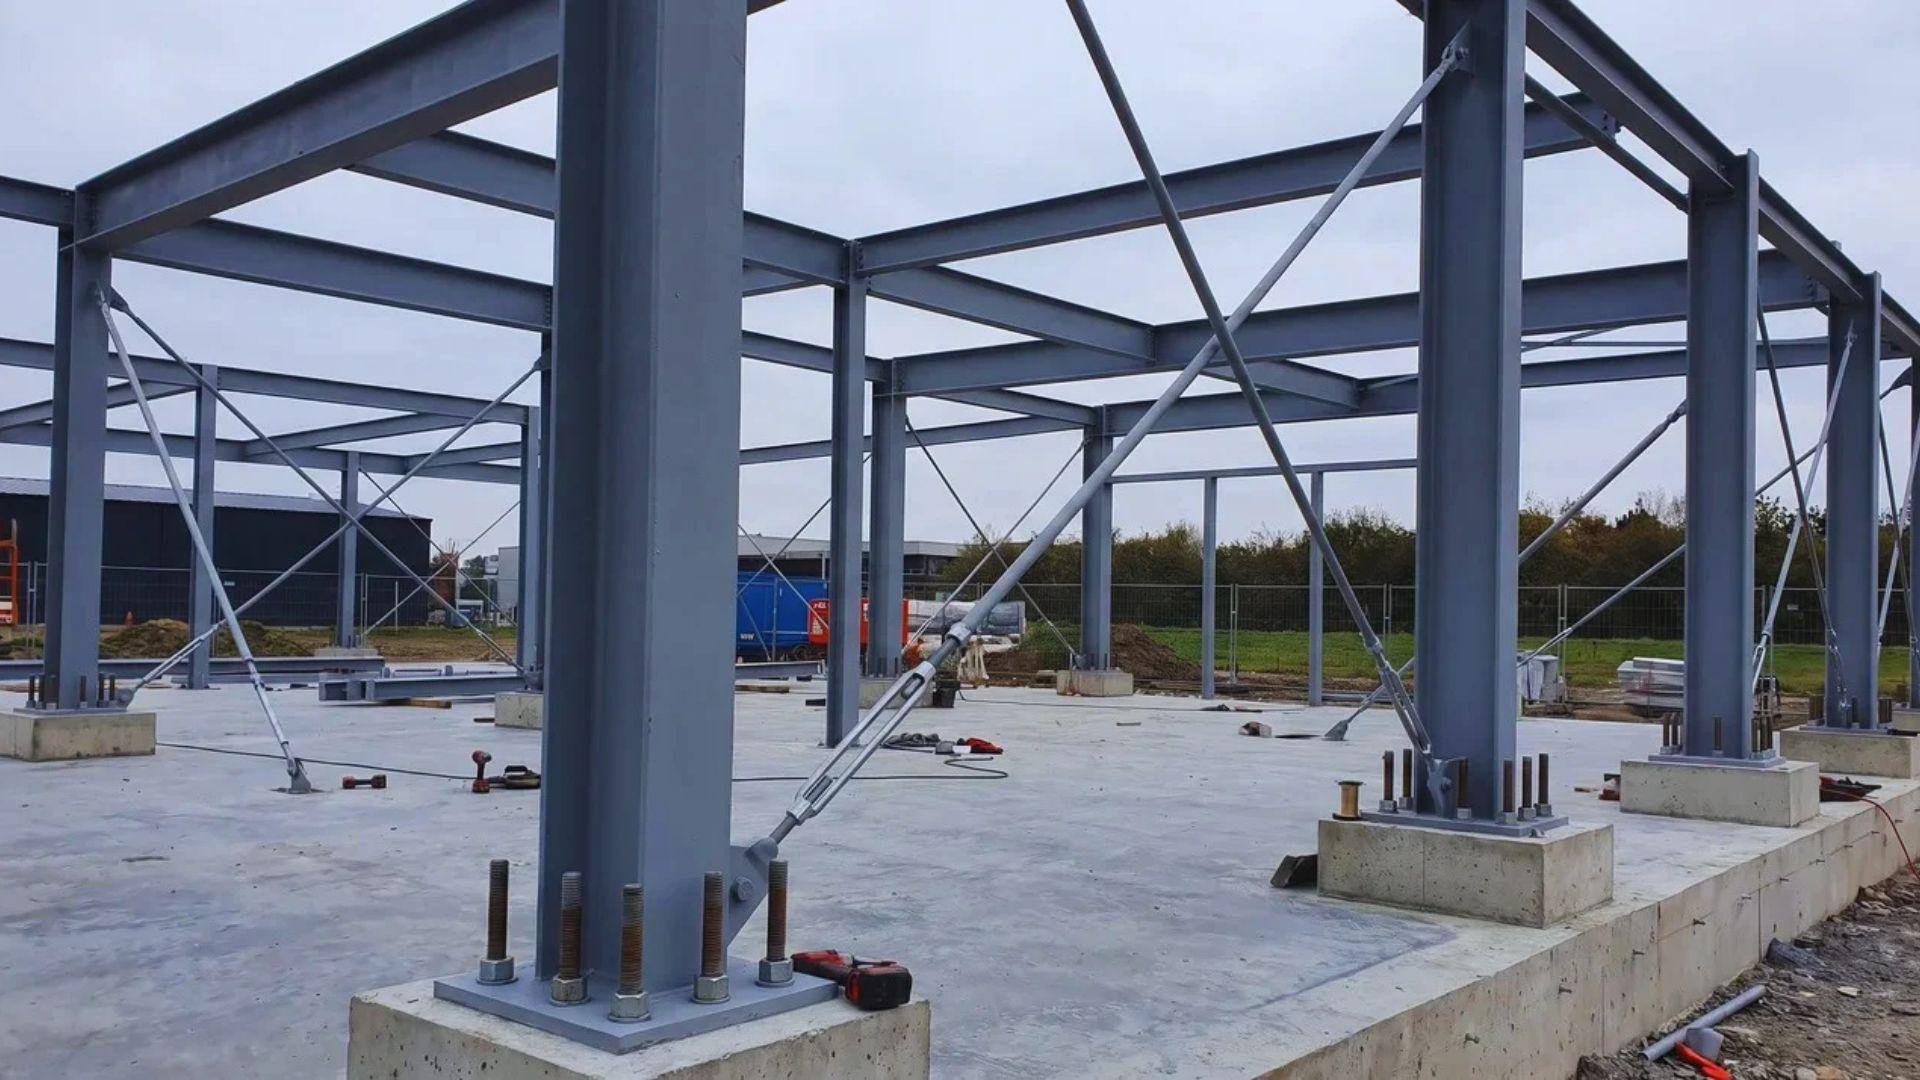
Self-install failures usually start at the foundation and frame stages, not in the later steps. Common culprits are a frame that drifted out of square, anchor bolts in the wrong spot, and flipped purlins.
Skipped bracing is the fourth, and it leaves a half-built frame free to lean or fall in wind.
Panels make these mistakes hard to fix. Once they are screwed on, the error is locked in, and fixing it means pulling the skin off.
That is why checks belong before the panels, when a fix means loosening a bolt instead of removing panels.
Run these checks before any panel goes on. Checking takes little time compared with pulling off finished work.
- Diagonal measurements across each bay should match within your manual’s tolerance.
- Every column should be plumb in both directions.
- Check each structural bolt against the tightening method and value your kit lists.
- Get the foundation and frame inspections signed off before moving on.
Treat inspection sign-offs as checkpoints, not hurdles. An inspector is a second set of eyes at the two stages where errors cost the most.
Seeing a frame get squared up teaches more than reading about it. Which video or diagram helps depends on the step you’re about to do.
Which Video Tutorials and Diagrams Help Most at Each Stage?
The most useful visual references are start-to-finish walkthroughs for the overview and close-up demonstrations for foundation layout and frame erection.
Watch one full walkthrough before you start, so the sequence feels familiar.
Great Western Building Systems’ complete steel building construction tutorial follows a pre-engineered building from start to finish.
Then switch to close-ups for the two riskiest steps: the anchor bolt layout and raising the frame. Short clips work well for panels and trim, since you can pause on how a screw seats.
A labeled diagram of columns, rafters, purlins, and girts helps when the parts list confuses you. Your kit supplier’s manual and drawings override any generic video where they differ.
Videos come and go, so search by kit type and building size, and favor clips showing the whole job.
Videos can show you the work, but they can’t tell you which step deserves the most care. That answer comes down to the slab and the frame.
Final Verdict
How to build a metal building goes best when you treat the slab and frame as the real project.
Get the anchor bolts right and square the frame before you tighten anything, and the rest goes quickly.
You now know the order, the checkpoints, and the places where a small slip grows into a big repair.
Pick the step you feel least sure about, and read your kit’s manual for it tonight. Then call your local building department and ask what they need before you order.
If cost, lifespan, expansion, or drawbacks are still on your mind, the short answers are below.
Frequently Asked Questions
Is It Cheaper to Build Your Own Metal Building?
Self-erecting a kit usually saves labor costs, but equipment rental, foundation work, permits, and fixing mistakes shrink the savings. It pays off most on smaller, simple kits when you have capable helpers.
How Long Does a Metal Building Last?
With coated panels and regular upkeep, a metal building often lasts for decades. Climate, coating quality, and sealed seams and fasteners decide how long yours lasts.
Can You Expand a Metal Building After It Is Built?
Often yes, if you plan for it. Tell the supplier before building a metal building, since end walls can be designed to come off and extend later.
What Are the Disadvantages of a Metal Building?
Common drawbacks are condensation without insulation, noise during rain, and dents from hail or impact. Local zoning or neighborhood rules can also limit where one can go.